Creating Customer account from admin panel
Customers usually create their own accounts from your e-commerce site or using Customer Cockpit.
However, you can also create customer account directly from the Admin or POS Cockpit, which is useful when customers order by phone or at a merchant location.
Note
The customer account created from the Admin or POS Cockpit has an active status instantly, so there is no need to activate the account by them
To create a New Customer Account:
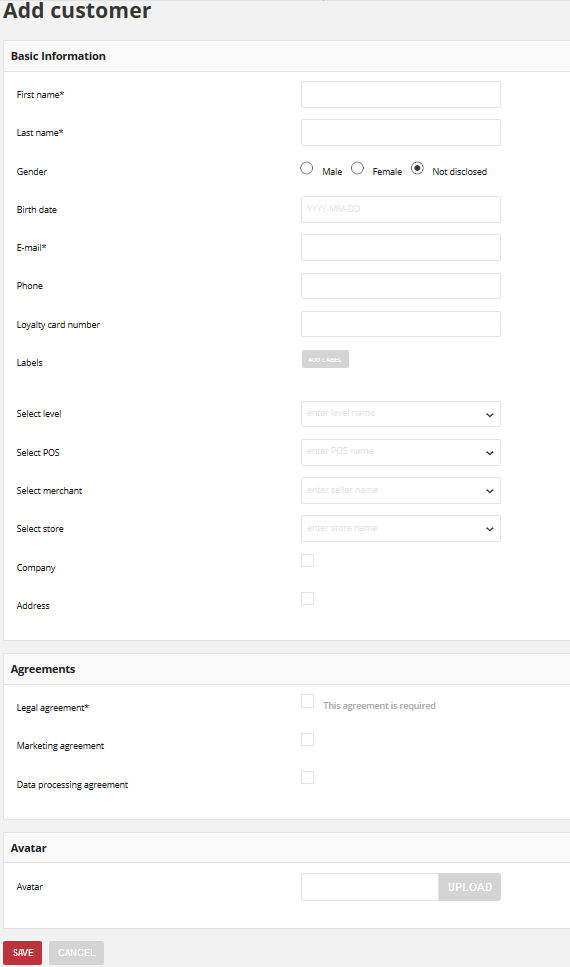
- Tap Customers on the Admin sidebar and choose Add Customer. You can also add a customer directly from All customers list by clicking
Add Customerat the top of the page

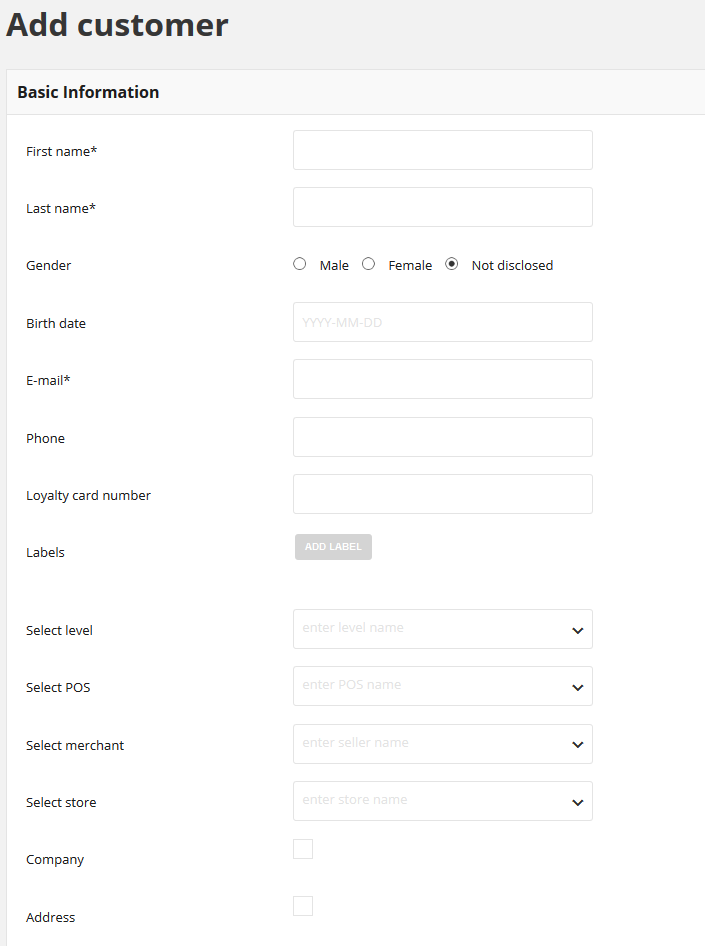
- In the Basic Information section, complete the following required fields:
- First name
- Last name
Note
Only one Customer account can be created per one e-mail address.
You can change the email address associated with an account by editing a customer
- In the same section, complete the optional fields as needed:
- Gender
- Birth date
- Phone (in one of acceptable formats)
- Loyalty card number
- Select level
- Select POS
- Select merchant
- Select store
Warning
For successful account creation customer needs to be assigned to any Level, so one of the following conditions must exist:
- Level with Condition value equal to 0 must be created. Customer will be automatically assigned to it.
- during account creation you will manually assign any level in the Select level field
If applicable, create Label(s) you want to refer to customer. Labels are intended to be used to specify identifying attributes of customer.
Labels can be used to organize and to select subsets of customers at customer segmentation process. To learn more about Customer segmentation, see Segments
- To create Label, tap
Add Labeland do the following:
- Type label Key, which is a label name
- Type label Value
For example: Key – Customer type, Value – wholesale
Repeat the process for all labels you want to be used in your Loyalty Program

Note
Labels can be added to a customer during account creation and subsequently added and modified at any time
- Mark Company checkbox, to complete customer’s company information if needed.
- Mark Address checkbox, to complete customer’s address information if needed.
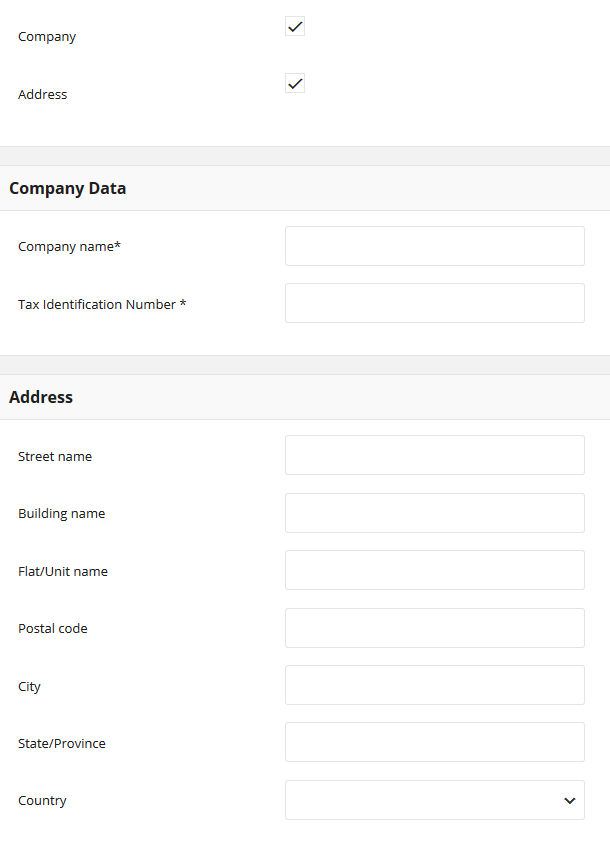
- Company Data section is available only when Company checkbox is selected.
All fields available in this section i.e. Company name and Tax Identification Number are required and need to be filled in.
- Address section is available only when Address checkbox is selected. Complete the following required fields:
- Street name
- Building name
- Postal code
- City
- Country
In the same section, complete the optional fields as needed:
- Flat/Unit name
- State/Province
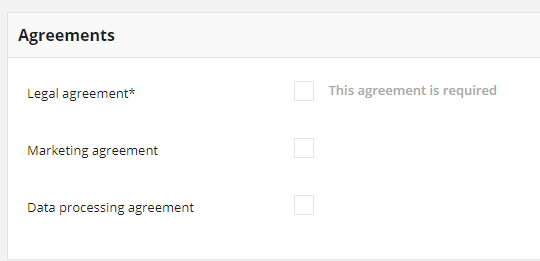
- Mark the Agreements that customer has agreed to. Legal agreement is required and needs to be filled in to set up an account.
- When complete, tap
SAVE
When the customer account is saved, its record appears at All customers list.
The Customer Profile Details tab displays a summary of account activity and data provided during account creation. To learn more about Customer Profile, see Profile details
Field description
| FIELD | DESCRIPTION |
|---|---|
| BASIC INFORMATION | |
| First name* | The customer’s first name
|
| Last name* | The customer’s last name
|
| Gender | Identifies the customer’s gender as Male, Female or Not disclosed
|
| Birth date | The customer’s date of birth.
Information can be used to offer points for the birth anniversary
|
| Email* | The customer email address.
Is used as a login name while logging to Customer Cockpit.
|
| Phone | The customer’s phone number. Formatting is as on follow example:
|
| Loyalty card number | The customer loyalty card number
|
| Labels | Internal tags you can use to refer your customer.
If applicable, can be used to segmentation to identify the customers
that this segment applies to
|
| Select level | Starting level assigning to customer
|
| Select POS | POS which will be linked to the customer
|
| Select merchant | Merchant account, which will be linked to the customer
|
| Select store | Store linked to the level
|
| Company | customer associated with company.
If marked then additional sectionwill be shown.
|
| Address | customer address needed.
If marked then additional section will be shown
|
COMPANY DATA
Visible only when Company checkbox is marked
|
|
| Company name* | The company name, if applicable for this customer
|
| Tax Identification Number* | The company TAX / VAT number
|
ADDRESS
Visible only when Address checkbox is marked
|
|
| Street name | The street address of the customer
|
| Building name | The name/number of a building or property where the customer
resides at this address
|
| Flat/Unit name | The flat/unit name or number of the customer at this address
|
| Postal code | The postal code of the customer at this address
|
| City | The city where the customer resides at this address
|
| State/Province | The state or province of the customer at this address
|
| Country | The country where customer resides at this address
|
AGREEMENTS
|
|
List of consents to which the customer can/has agreed.
Options include:
|
|